
Renovating a Caravan!
You know, sometimes renovating a house is just too big of a job. Sometimes you think you’d like a mini version of that challenge so you can actually finish it in a reasonable time-frame. Sometimes you think that buying an old caravan and renovating it for use in family holidays is the way to go about that.
Sometimes you actually go through with this idea…
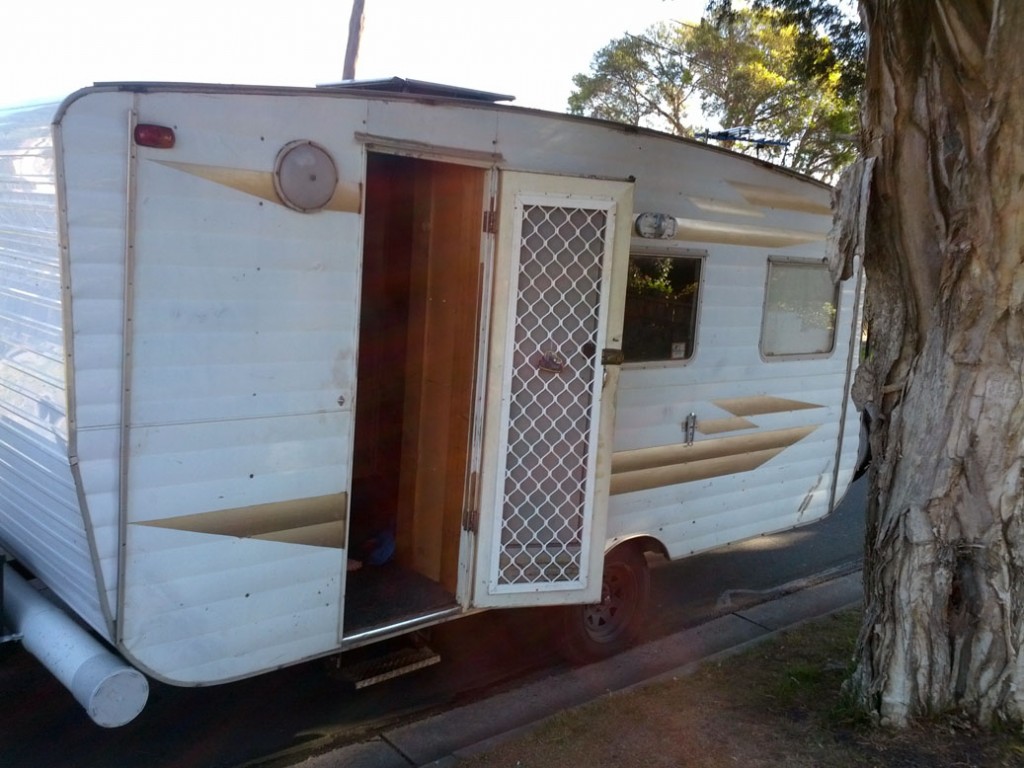
So, here is the van as it was when I first saw it. I bought it without Belinda ever seeing it (she was at work and unreachable at the time). There was much, much anxiety and buyer’s remorse after doing so and getting it home initially.
“What a piece of junk”
“Are we ever going to get it to be a good family caravan?”
“Did I pay too much?”
All of these have fallen away now, it’s very much become our caravan. I in particular have developed a bond with the old girl (they’re always female) due to spending so much time with it getting it ready for us to use.
What is it?
There’s only so much I know about it, but this is what I know:
- It’s a Viscount ‘Duralvan’, probably from the early 1970s, and most likely an ‘Ambassador’ model. (Great thread on the history of these caravans here)
- It’s a 16 foot model
- It originally had windows front and back, but the previous owner took out the front one to install 3 bunk beds in the place there used to be 2, and took out the rear one to install an air conditioner and bike racks.
- It once had the axle break and fell on it’s rear left edge. There is damage there, but this prompted the owner to have a new draw-bar made for it. He was working in a steel yard at the time, and so it has a seriously heavy-duty draw bar now, and new leaf suspension and disc breaks, sitting on light truck tires.
- It had virtually no leaks (almost always a problem with old caravans)
- The previous owner had used it as his home as he travelled around Australia following work.
- It includes a large annex that we are still yet to see attached as it can’t fit while it’s in our driveway.
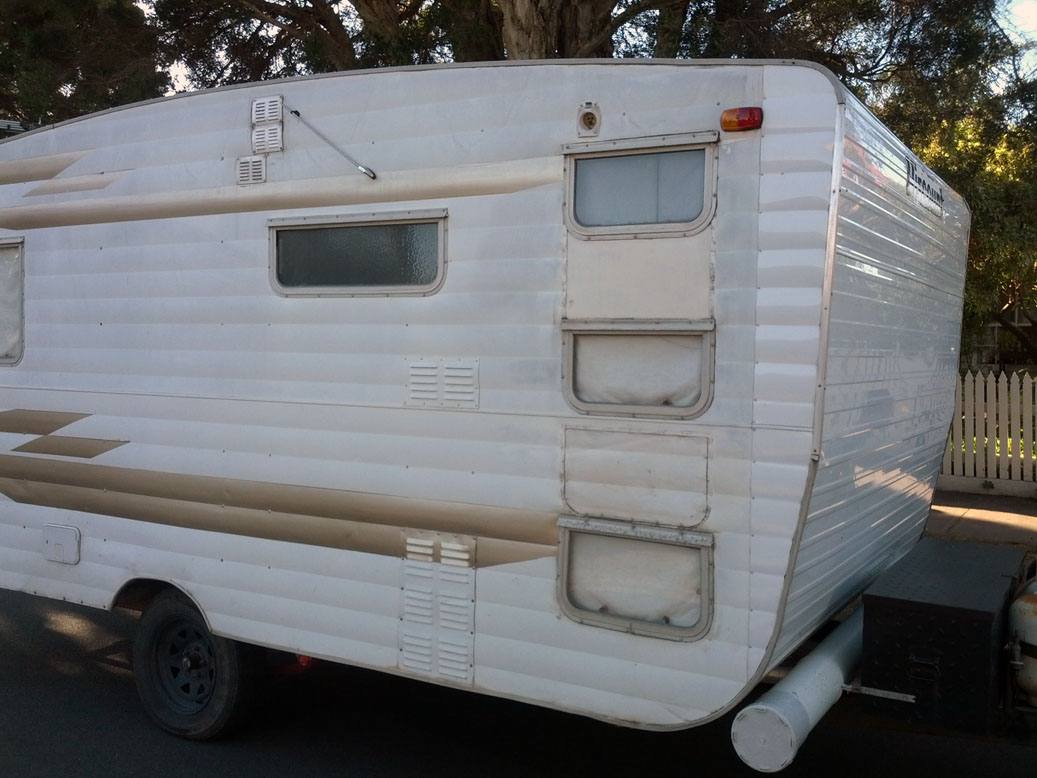 And here is what the other side of the exterior of the van looked like when we bough it (and to be fair, looks pretty much identical now). This is the bit that’s not going to look perfect after a few coats of paint. The previous owner moved windows around to suit the three bunks he had there. The only real solution here to make it look great would be to reclad this bit. That’s not going to happen due to a) budget, b) my wanting to do anything to the exterior of the van that could compromise the weather sealing of it, and c) just the time to do that properly. I’ll see what I can do to fill the creases and hopefully, when painted up, it’ll look better.
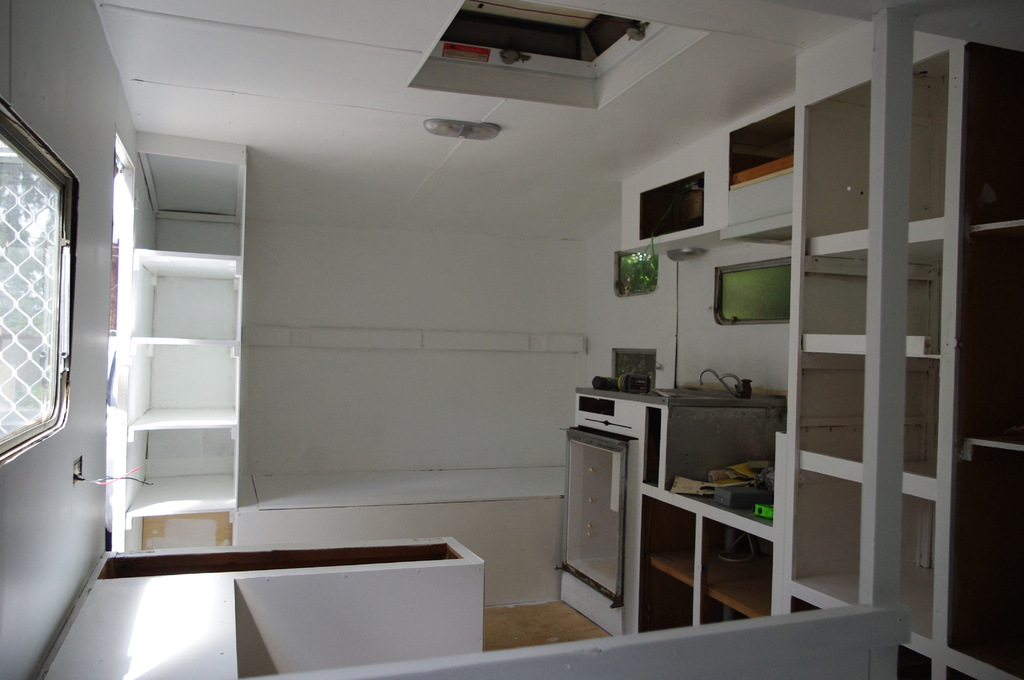
Inside it looked like this:
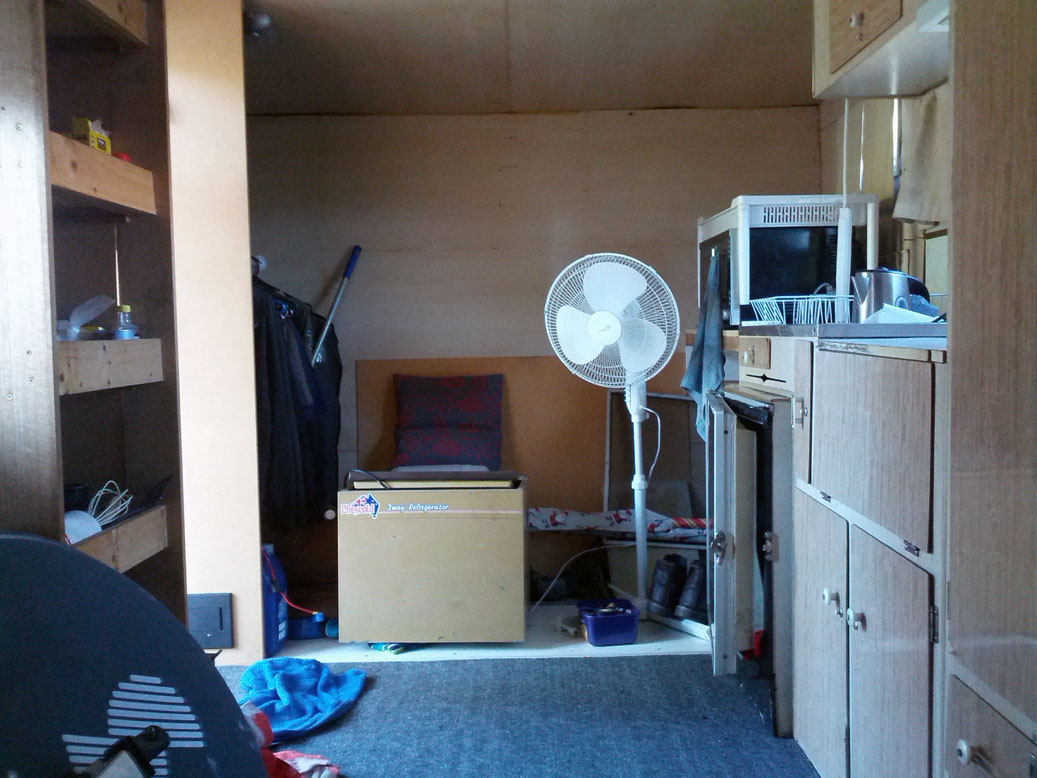
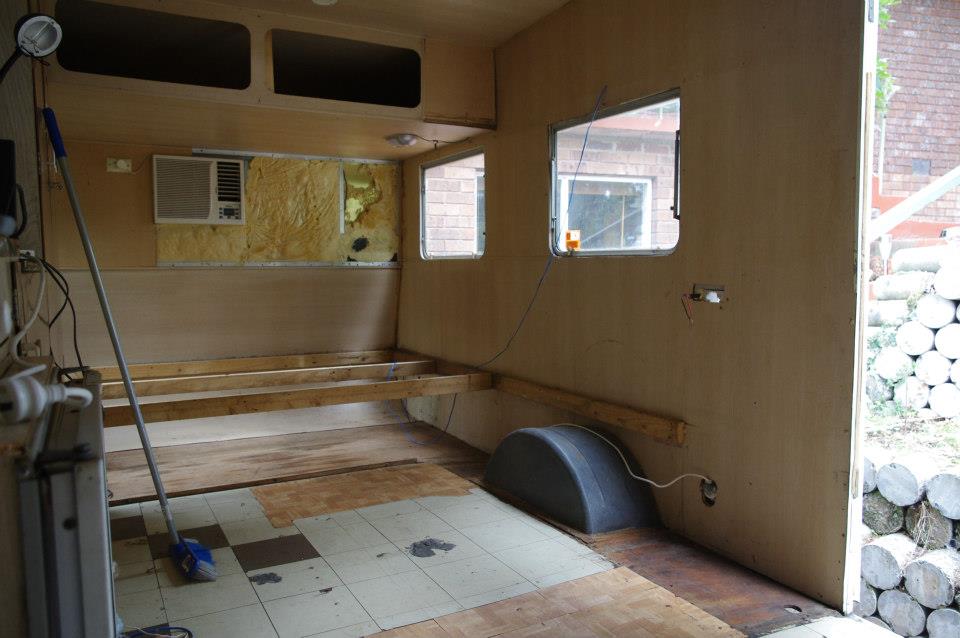
Pretty stripped out really. The owner was living out of this van while he travelled around Australia following work. So he’d made it suit his needs, and wasn’t that concerned with the look or feel of it.
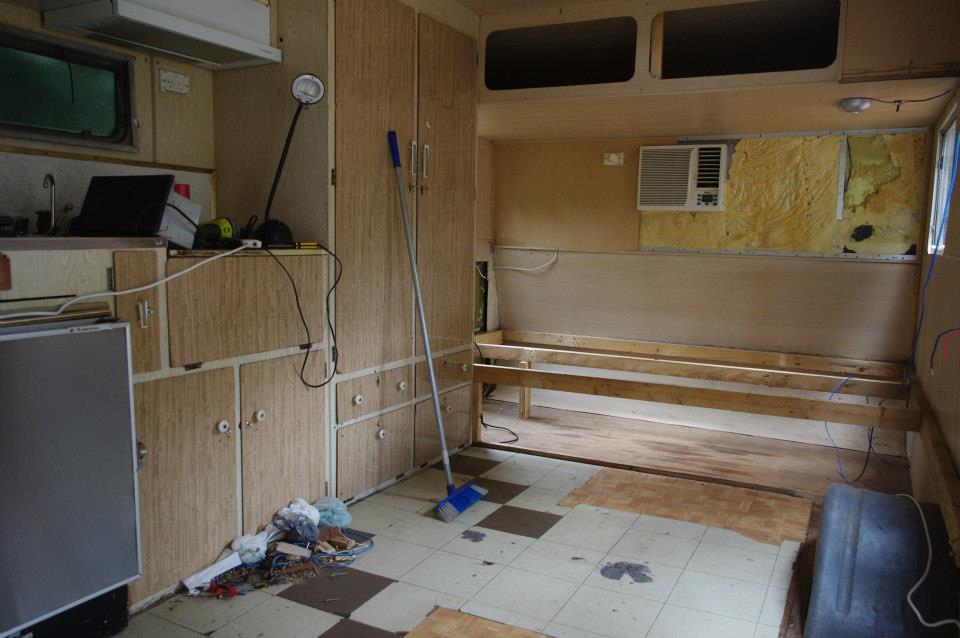
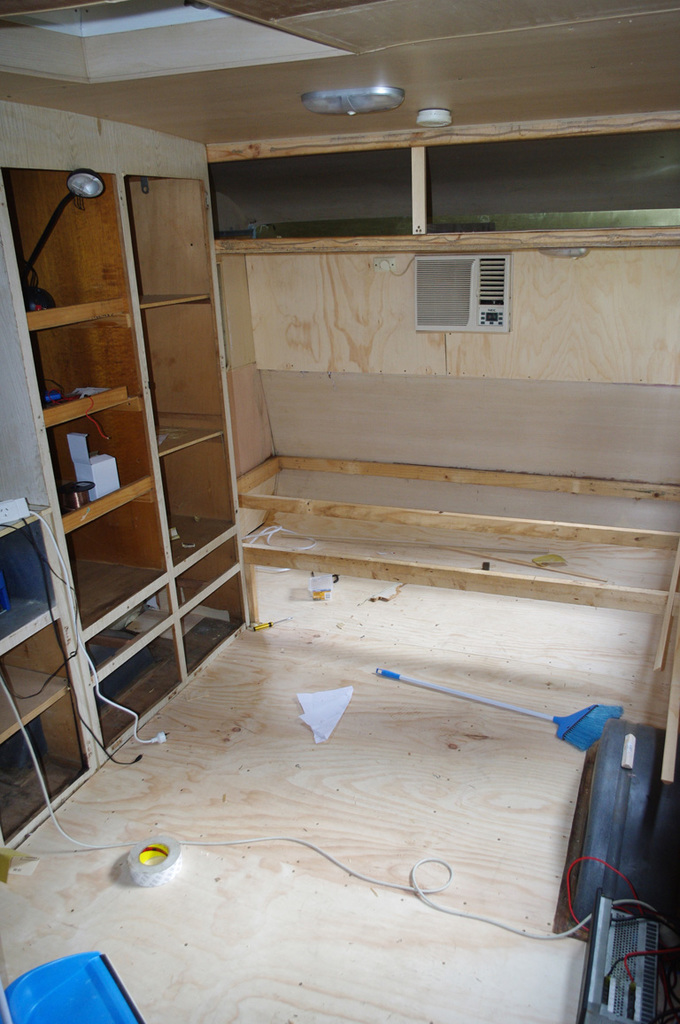
This is looking to the rear, with the bed along the back and the air conditioner in place where the window used to be. Also, half the wall has no cladding due to him tracing a leak, and never bothering to put the wall back on. No seating in the van as it stands.
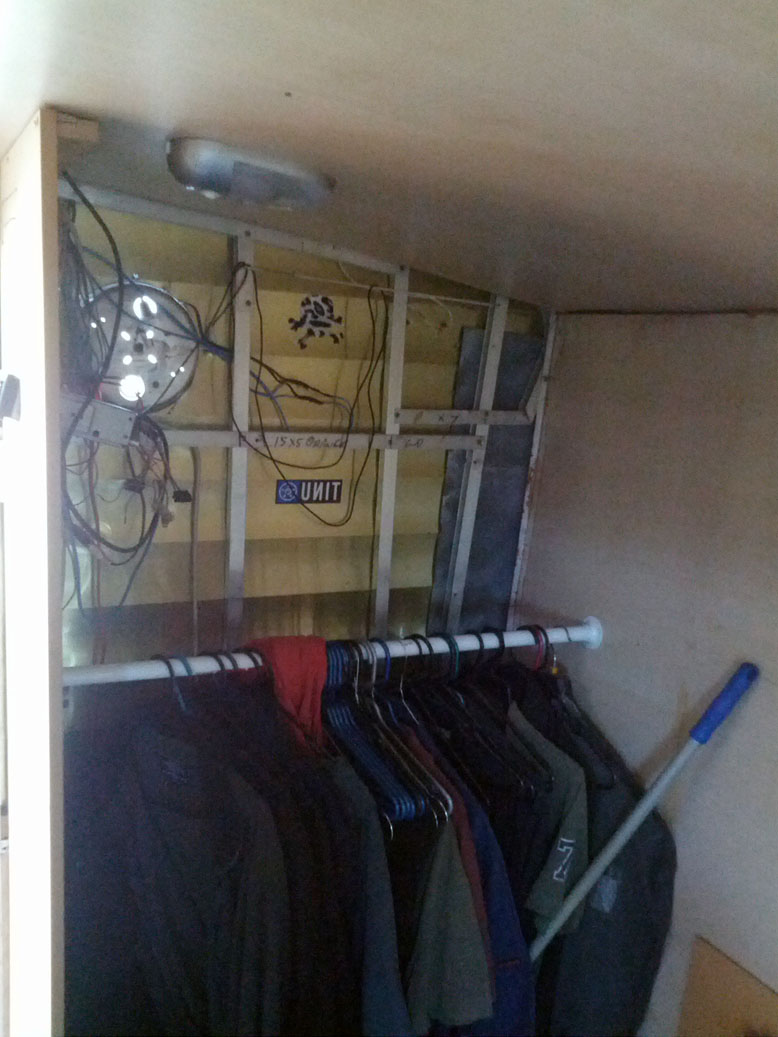
Up the front, his ‘wardrobe’, and showing that there was more missing panelling, and also the state of the wiring! Still, it also shows that these old ‘DuralVan’s are awesome for not corroding or visibly aging over time. Aluminium is a great material as far as I’m concerned.
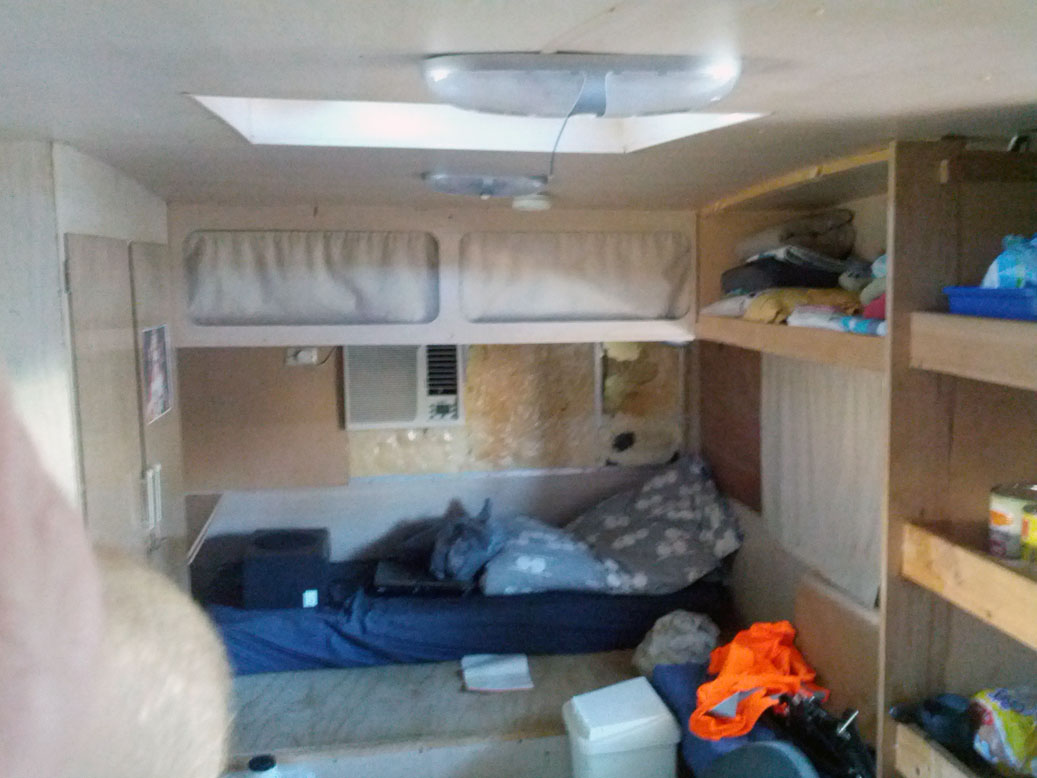
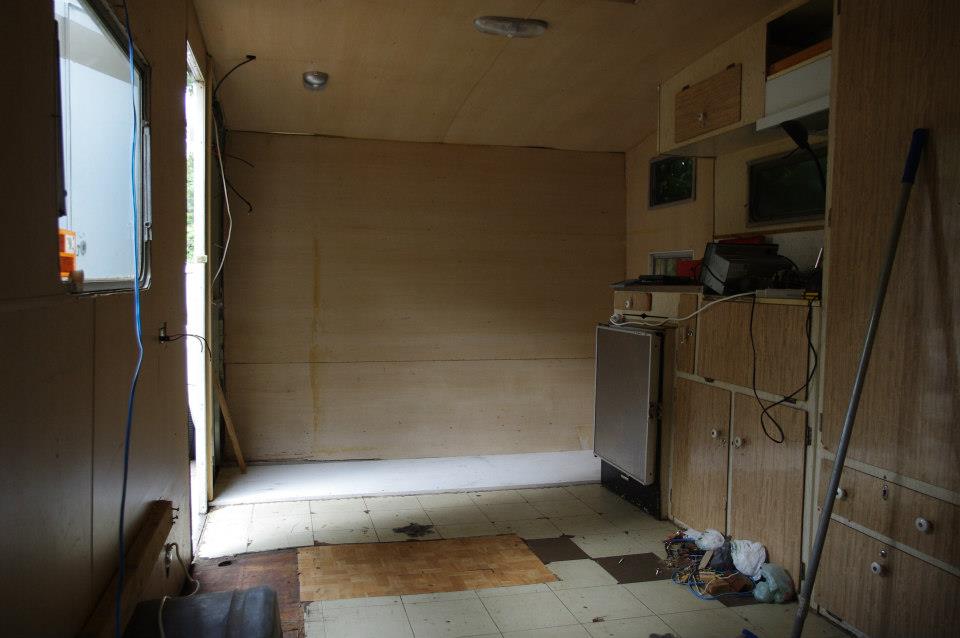
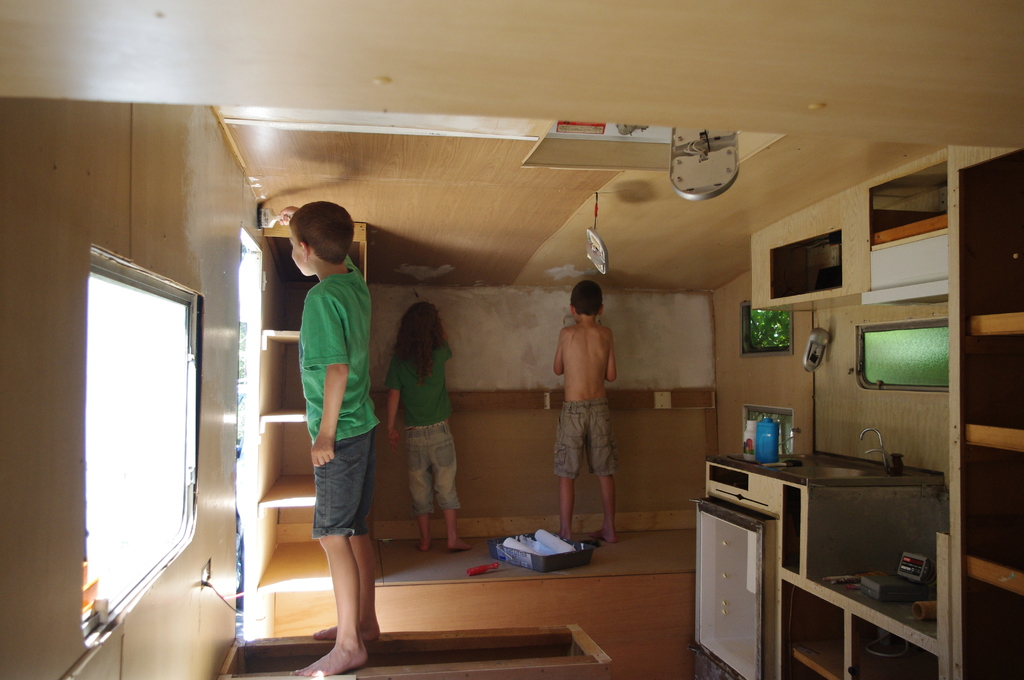
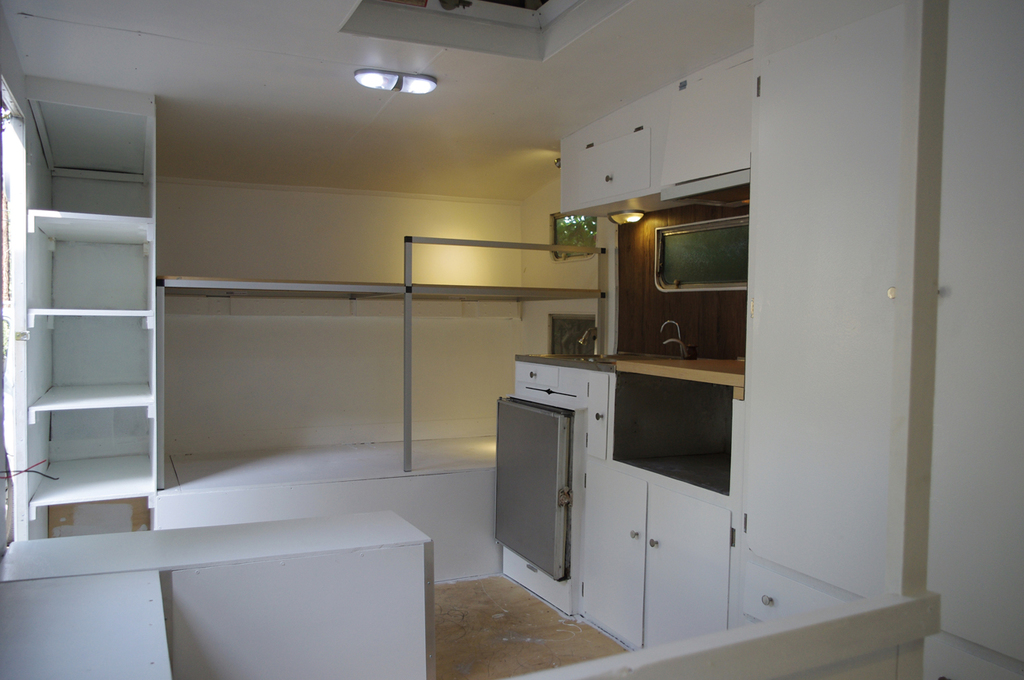
We got it home and Belinda attacked the interior, removing all the stuff the guy had left in the van (a lot of junk, but also a lot of stuff we’ve found to be useful as well), until it looked like this:

Then I pulled out the structures we didn’t need, and we’re left with this.
So, not much to start with. But the fridge works (took me ages to realise this as it’s absolutely silent), the cabinetry around there is solid enough, and as mentioned, it’s almost entirely water tight. (small leak appeared in back left corner, which I traced to a hole left where a tail light was, since fixed).
What to do?
In a completely not-to-scale way, here is the layout of the caravan as we designed it to be for us.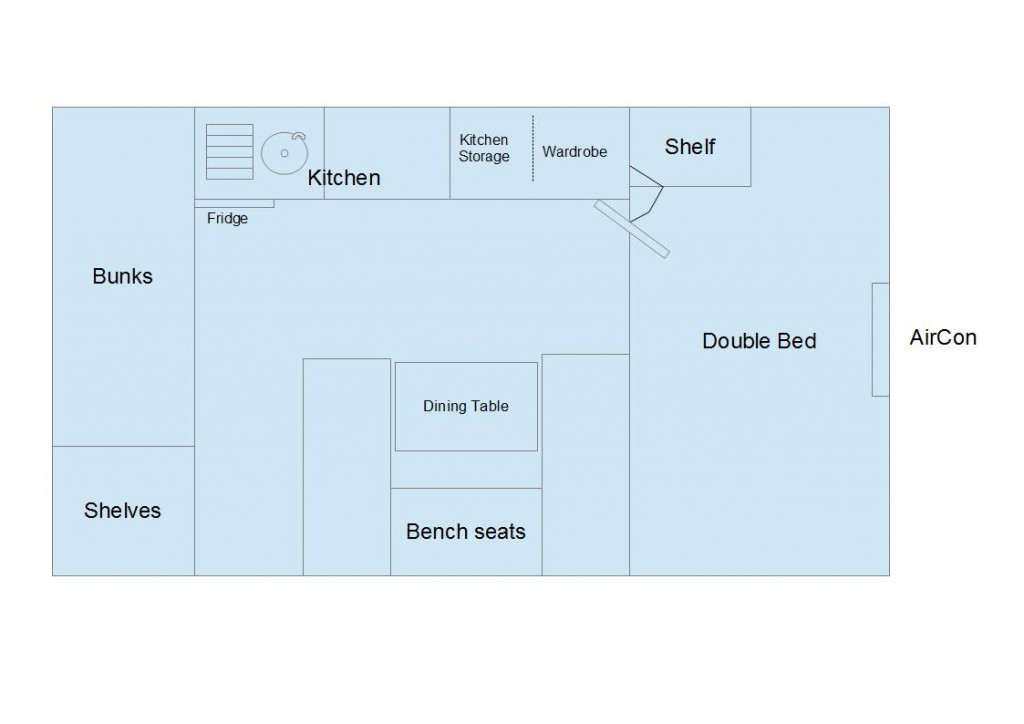
- Two bunks up the front, with the initial idea that the top bunk can fold back against the wall making that area be a bench seat. But through trial and error I’ve ended up with a situation where the top one cannot hinge down (without the top bunk being too high or the bottom being too low), and so the only way to convert it now is to pop the top bunk off it’s rail and manhandle it into the vertical… it’s not particularly graceful. And so I think it’ll remain made up as bed 99% of the time.
- Set of four shelves and a shoe area next to there, so each of the kids has a shelf for clothes and stuff.
- Then we’ve reinstated the basic idea that the caravan would have originally had, in a U shaped dining area with a table that raises and lowers on an adjustable leg. So you put it down and a cushion on top to make that area into a double bed at night.
- Next to that, with a curtain that can be pulled across, is the main queen/double bed. At the foot of the bed we have a shelf and power (and aerial cable from the aerial on the roof) and a swing arm screen mount which holds an LCD screen to show content from our laptop.
- Then the kitchen area is all original layout.
- All beds and seats have storage in them, and the double bed has overhead storage too.
- The caravan is being set up for use in powered/watered caravan sites only at the moment. It has a 240V->12V inverter to power all the 12V lighting and a 12V external outlet, and if I bought a deep cycle battery I could run that system from that. Then there are 240V points also run off the 240V system. Water is provided by way of plugging in a hose, and the sink does have a pump tap, so I will re-attach the pipe from that so that you could set up a container of water to use for that if really desired.
- No gas is being provided to the interior now. There is a gas pipe, which is there to supply the fridge but I’ve turned that off, and I removed another line that supplied gas to the cooktop that sat in the kitchen. Cooking will be provided via the combination microwave/convection cooker that was in the caravan when we bought it, which frees up bench space, and any flame cooking will be done outside on a BBQ stove.
The process
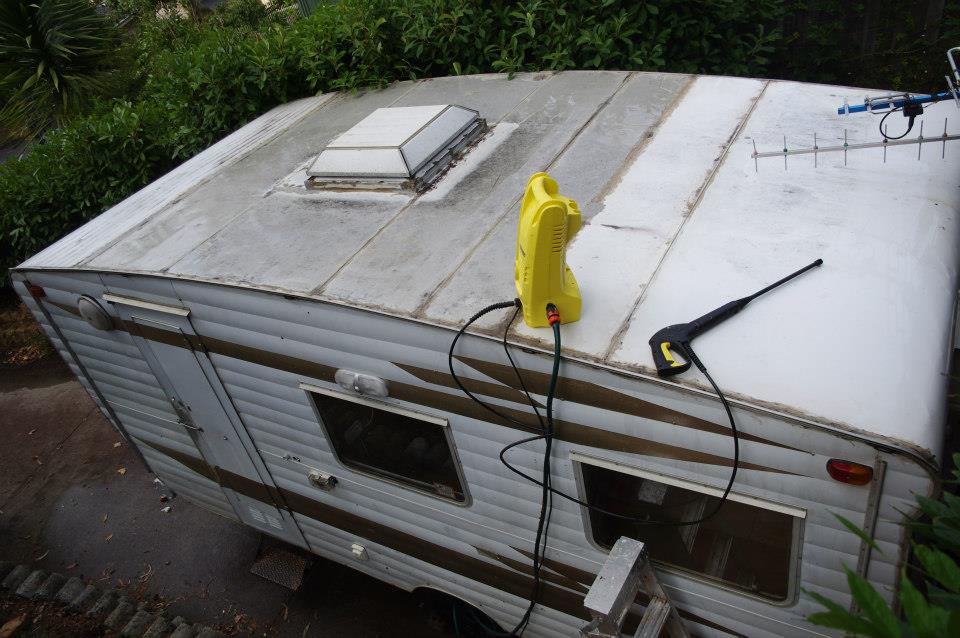
During a first wash of the outside, you can see it’s in pretty good nick, but has really messy sealant. Will be stripping that back to smooth, re-applying, and then painting on with rollers a new, fresh colour-scheme.
With it gutted, it was then time to lay some fresh floor (plywood) to give an even starting point and add some strength, and also put on fresh panels on walls and areas of roof where there were too many holes or just sections missing. Which got us to this point:

This also shows all doors taken off the cupboards for cleaning, repair and painting. The other part of this stage that took some time was tracing wiring and redoing most of it, so that there are three systems in place.
- 12V break/running lights system run from the trailer plug from the tow-vehicle
- 240V system run from the external 15Amp 240V plug on the exterior of the van
- 12V lighting system run off the inverter (which is run from the 240V system)
As part of that I rearrange a few of the existing lights, and added reading lights for the bunks and main bed that look like this:

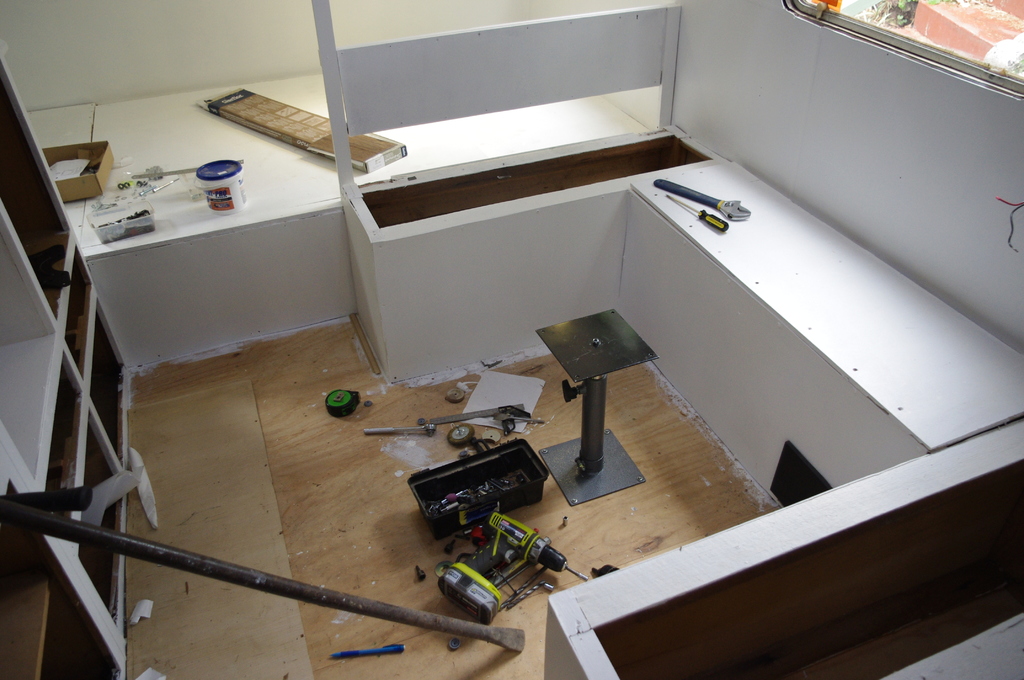
With a sound foundation of walls/ceiling and floor to work off, and power going fine, it was down to building the required furniture.
First up were the bunks. I mentioned on a caravanning forum that I wasn’t sure what I was going to build them out of, and another member who had renovated a similar Viscount caravan had used aluminium tubing. I loved the idea of this as it’s light, strong and looks great. Bunnings stocks it in a number of lengths, and has all the connectors. Et Voila!

So… you can take those front poles off (they have connectors attached to the bottom bed) and then lift the bed up, off the back rail, and put it flat against the wall to create a bench… but… well… it’s heavy, and you tend to scratch the walls doing it, and it’d mean unmaking/remaking the beds… so… yeah. It’s a ‘maybe do once in a blue moon’ type thing.
Re-building the main bed, and creating the U seats for the dining area continued along until things got to the point of needing a coat of paint to freshen it up.

What’s the point of kids if you don’t use them for free labour? The second shot shows my original table for over the foot of our bed. After the first trial run of having the laptop there I discovered it really was woefully undersized, and so used the left over portion of Ikea table top.
Amazing what a bit of white paint can do for the look of a space. Still, doesn’t look finished yet, lots of missing doors.
So let’s put those on. All sanded back, hold filled, new entire fronts where required, and new brushed chrome handles. Looks much nicer.

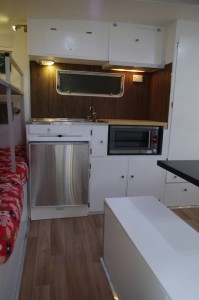
Looking back at the kitchen area you can see our solution for a splashback. The original one was a very dated ‘speckly’ piece of laminate that looked a bit old. We looked around a lot, thought about using thin tiles, which would have looked great, but also would have added too much weight. Looked at perspex, discovered that was way too expensive, and then found some vinyl floor planks that look and feel like recycled timber. They look really great, and once I added a bit of extra glue to them (they are self adhering, but the glue isn’t really designed for sticking to walls) and some caulking they looked a treat. Table top area above where the microwave will sit is a proper bit of laminated particle board which Belinda got for $10 from the place that supplied our kitchen cabinets.
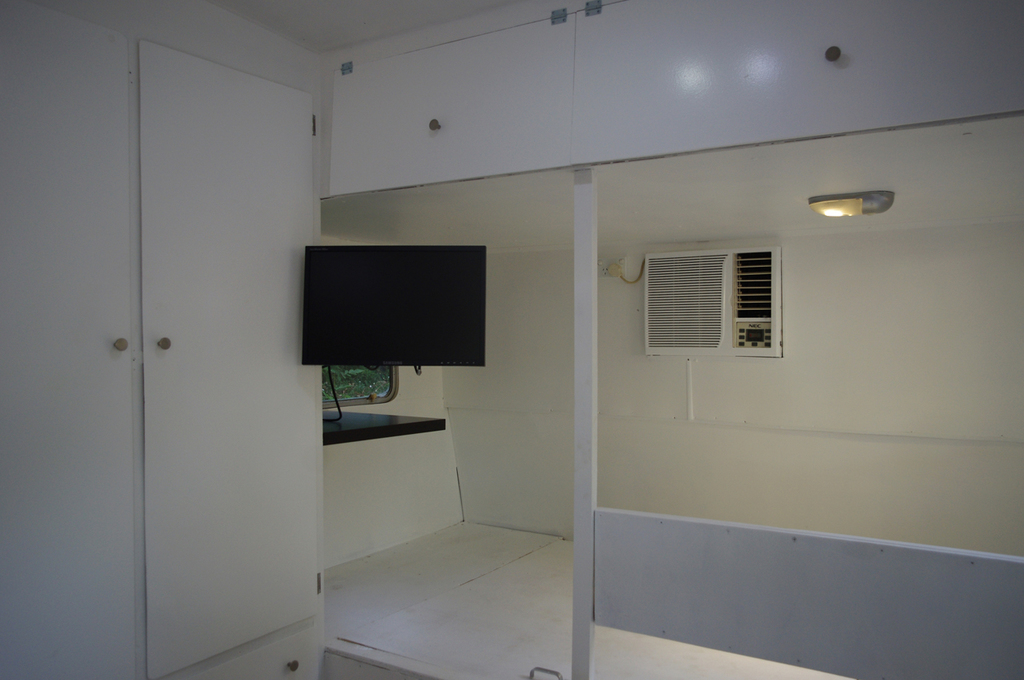
What’s a caravan these days without a swivel-mount screen?
Here’s a look at the dining area (two seats without their tops), and the adjustable table leg which will hold the table/bed base. Our first try for the table top is an Ikea table top sourced from their seconds area for $25. Being that it was so long, it’s also supplied us with the shelf over the foot of the bed.
Last ‘hardware’ steps for inside were then caulking around the kitchen, liquid nailing on a few things that can’t be screwed on, and then laying the vinyl floor.
And here is what it looked like after those steps were complete.
Vinyl in and edged using aluminium. I was going to use painted wood as the edging (much like skirting boards), but laid some extra aluminium on a portion and loved how it looked, so went straight out and bought some more. I think it gives a modern look to it, and also meant I didn’t have to paint.
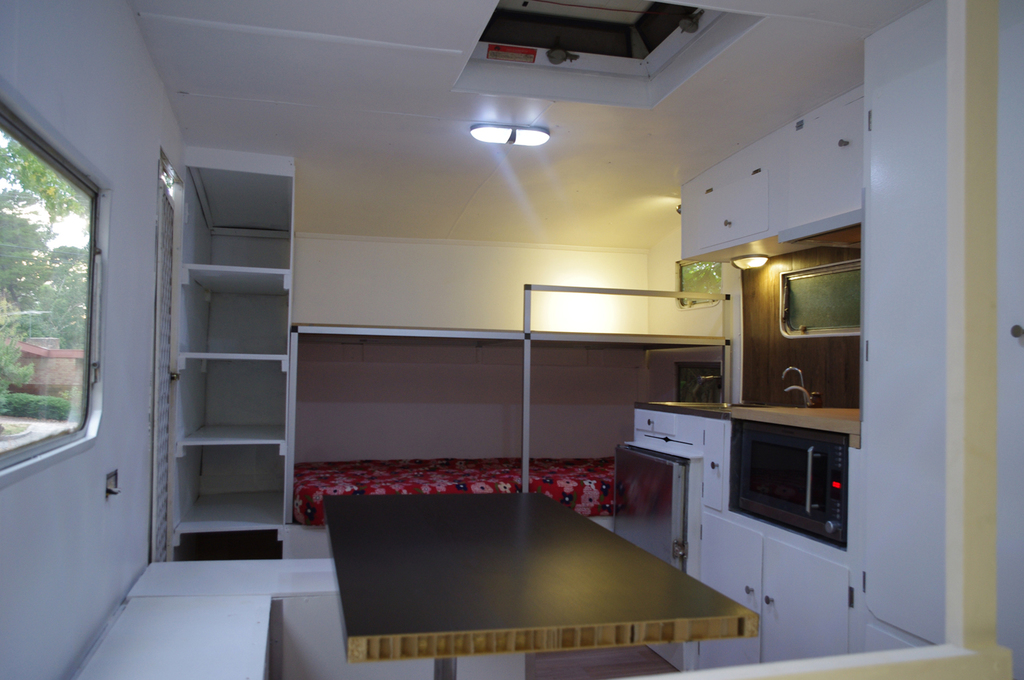
This shows the Ikea table top in place, but without the new end I have to give it, being that it is a hollow core table top that I had to cut to length (only the ends and edges are solid, the rest is cardboard). This also means the centre of the table, where the leg attaches, is not strong enough to screw into, so I have to glue on some thick MDF to that portion to give it a stable point of contact.

Another view.
Ready for first trip!
So, what do you do when you’ve had the interior pretty much finished for a while, but can’t see when you’ll have time to get the outside looking nice?
Take it out for a trip of course! So that’s what we’re about to do. A four day trip to a caravan park in Angelsea to break it in (hopefully minus any actual breakages). Belinda got cracking on the sewing and so now we have curtains on all the windows and cushions for the bench seats! What a difference soft furnishings make!
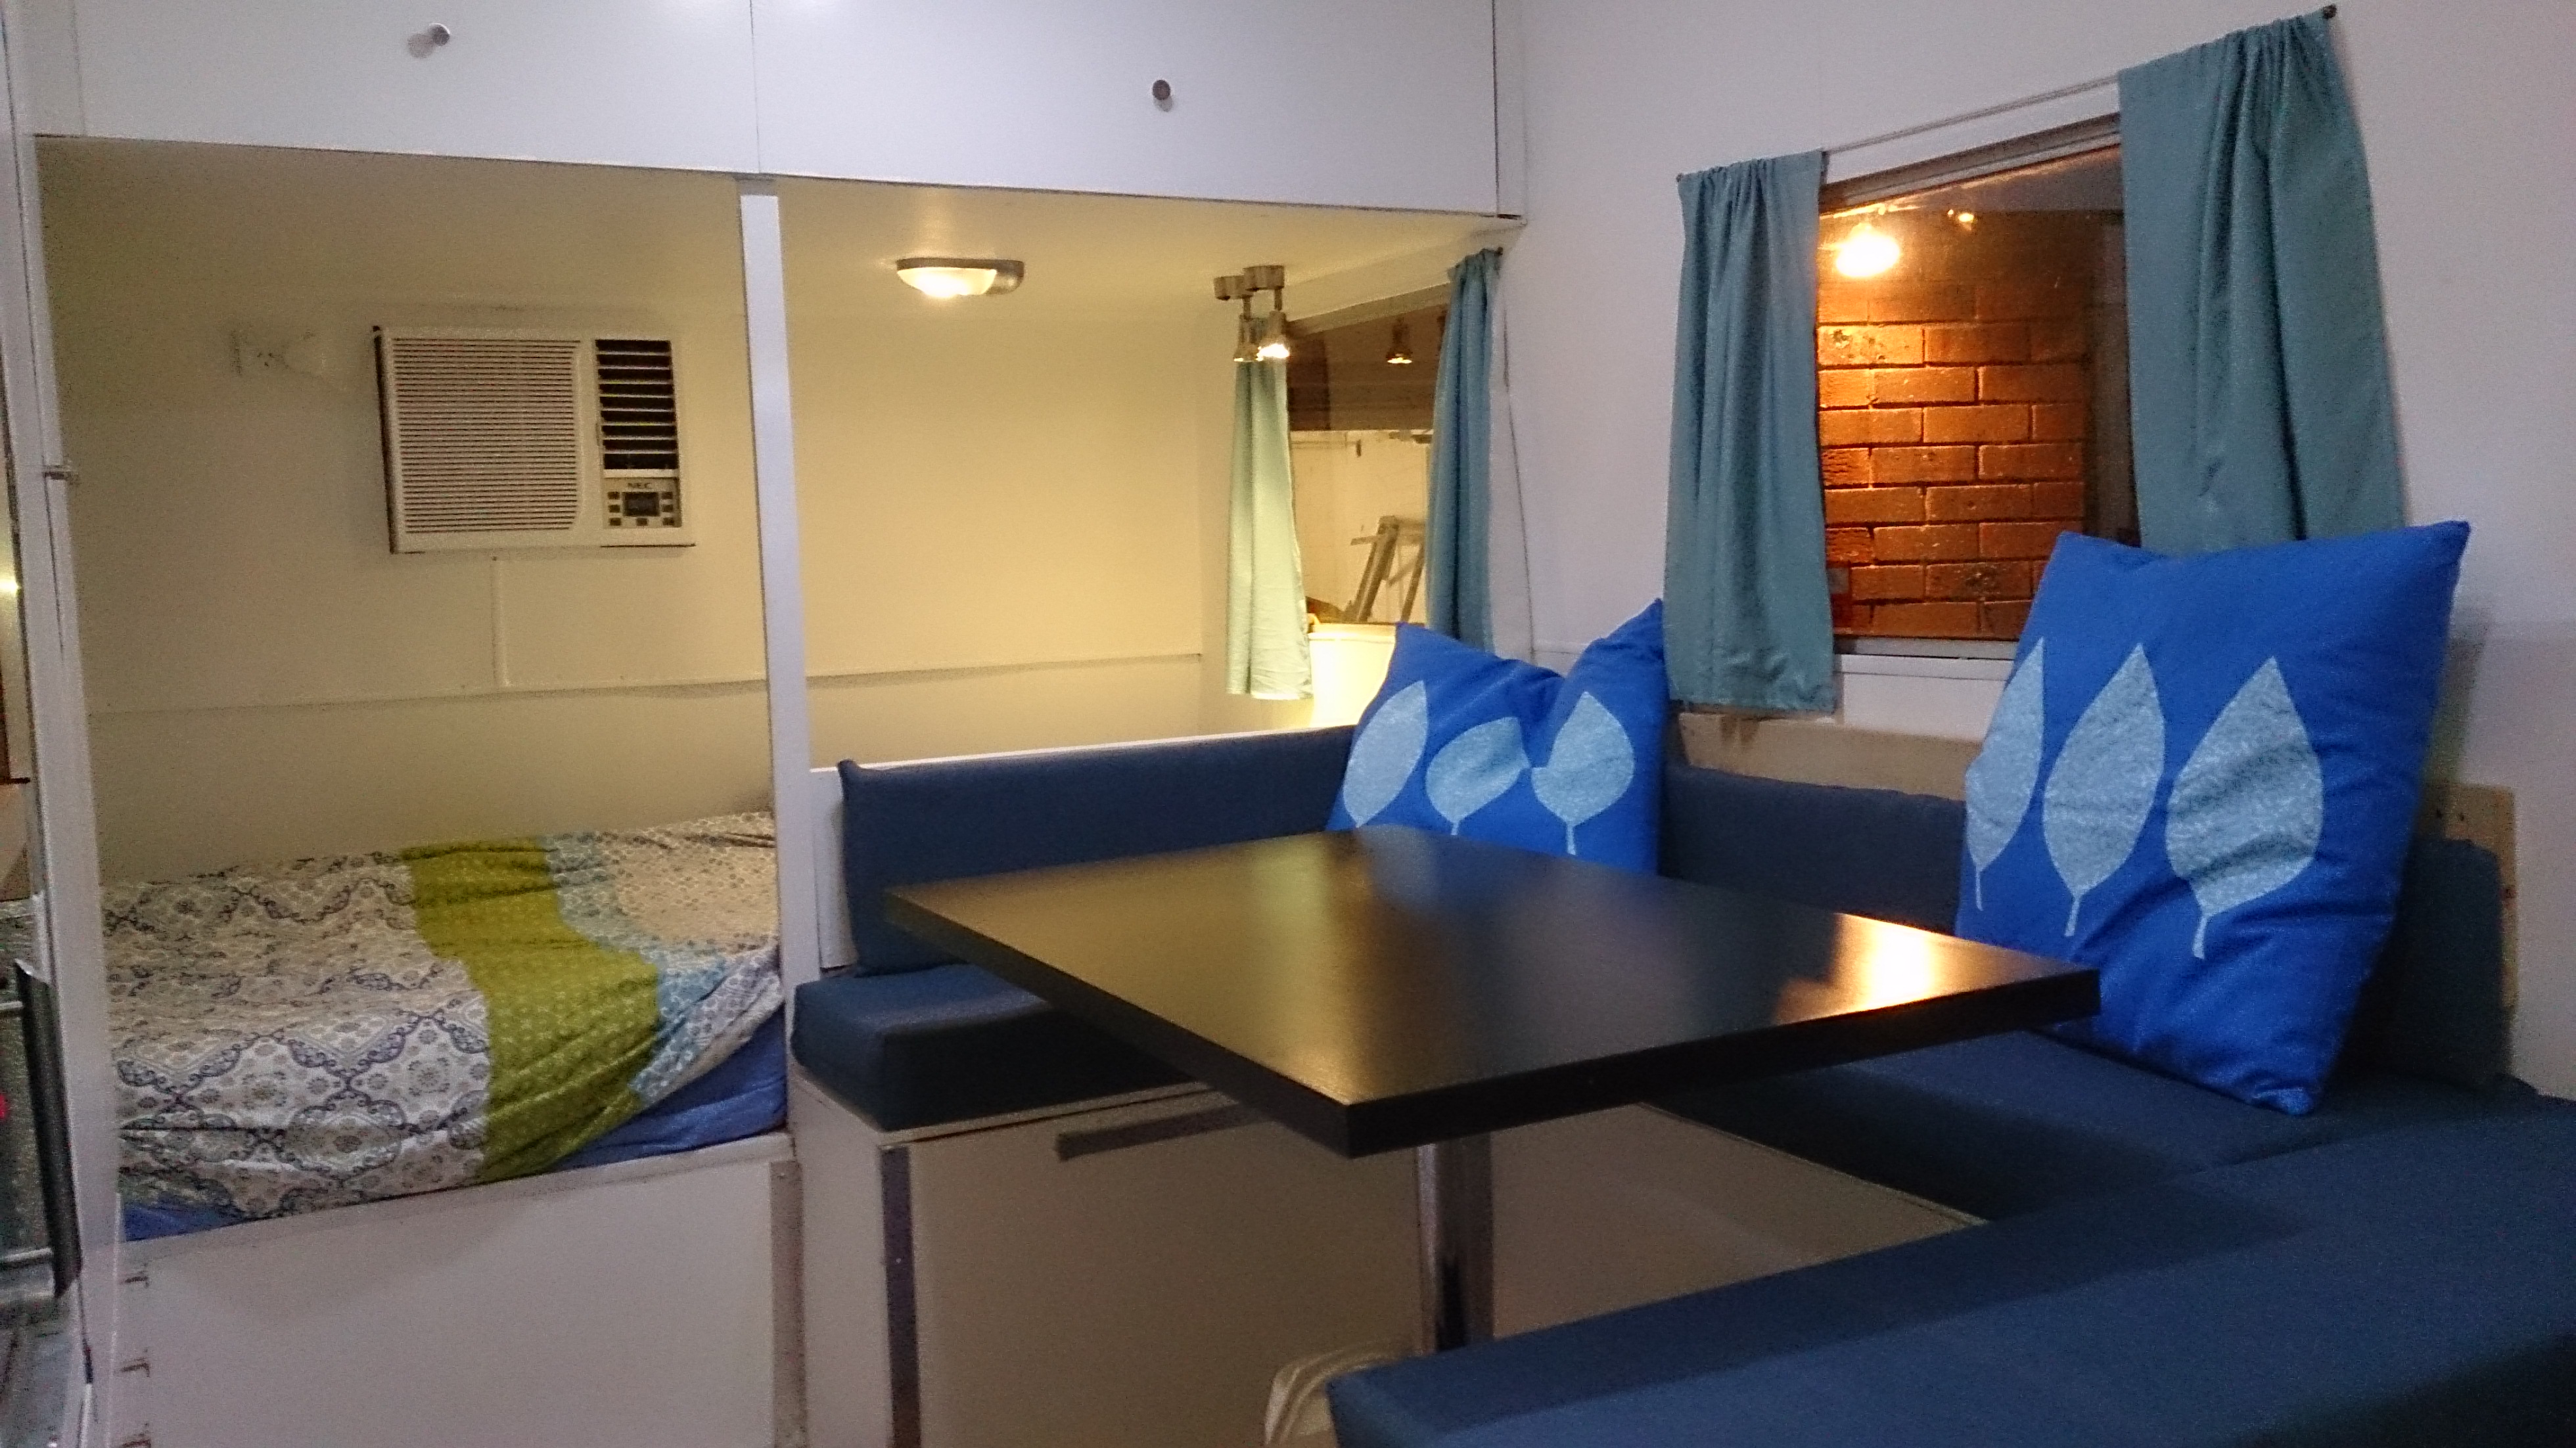
And then, put some bedding on the bunks, and suddenly you’ve got things looking homely

And, let’s add some kitchen utensils in Ikea buckets to make it look a little special.

And so… there it is. A caravan from dump to really nice and homely. Still bits not finished. Still the whole outside to do. Still don’t know how well it’ll go in actual use (although it has been fully serviced and safety checked, and myself and Eibhlin have spent a night sleeping in it)…
More to come!